Posted on Leave a comment

Avoid these mistakes while applying for Digital Signature Certificate

Mistakes to avoid while applying for digital signature certificate

Digital Signature certificates are becoming increasingly popular. Almost all government online form submissions require them. From company registration to tax filing, you need DSC everywhere. But did you know that more than 27% of people make mistakes while applying for a DSC? Today we discuss some of the common mistakes people make while applying for a DSC

Forgot to enter the PAN number

While making DSC it asks to enter PAN number. But it is not a compulsory field. Therefore many people do not fill it. Sometimes they forget to enter it as no error message or alert not popup by the system. Because it is not a mandatory field no system-generated alert appears. But you should know that sometimes DSC won’t work without a PAN number. Portals like the Income Tax of India, mandatorily ask for a DSC with PAN number in it. So next time you order a DSC, don’t forget to insert your PAN.

Wrong mobile number and email ID

While applying for DSC, some people enter a mobile number that doesn’t belong to them. Many people don’t have their email IDs, so they enter one belonging to their relatives or friends. Sometimes, the agent enters an unknown person’s mobile or email ID to complete the process faster. But you should avoid these common mistakes. All future correspondence will be shared with the registered mobile number and email IDs. A wrong personal detail will cost you more in case you lose the DSC or want to re-issue it. Therefore always give your own mobile number and email ID while applying for DSC.

Wrong DSC type

This one is the most common case. People do order DSC without knowing their application. Each work has its own DSC requirement. Similarly, Individual DSC orders were mistakenly placed for Organisation One. Mistakes like this can make you re-apply for fresh DSC. Because DSC once approved can not be altered.

Posted on Leave a comment

The Right Digital Signatures for Income Tax Filing in India

Digital Signature For Income Tax Filing.

Getting the right digital signature for the Indian Income Tax portal is very important. The DSC solves two major requirements. First is signing the final submission and second is logging in to the IT portal in case one forgot his password. During the submission of audit reports, a DSC is also required. Therefore one should choose a perfect DSC that can work seamlessly.

Filing income tax returns in India involves navigating through numerous rules and regulations. One significantly important aspect is the use of digital signatures during form submission. Digital signatures enhance the security and authenticity of the documents submitted electronically, and they are gradually becoming a crucial component of online tax filing.

What Is a Digital Signature?

A digital signature serves as an electronic signature that verifies the authenticity of electronic documents and transactions. It provides the same legal standing as a handwritten signature. Using mathematical algorithms, digital signatures create a unique code for each document. This code ensures the document’s integrity and helps verify the signer’s identity.

What type of DSC is suitable for ITR filing?

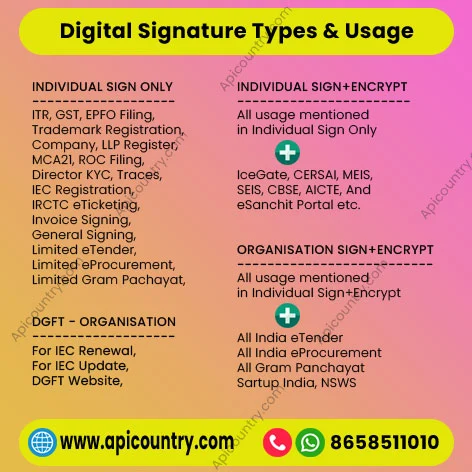
A Class 3 Sign-only DSC is perfect for the ITR portal. It’s also known as general purpose DSC which we can use for all major signing work. Refer to the image below to understand the general usage of this certificate. It is available for 1-year validity to 3-year validity. Select the one as per your requirement.

Digital Signature DSC types and their usage.

How to Obtain a Class 3 Digital Signature Certificate (DSC) ?

Anyone can buy a Class 3 digital signature using this link. However during placing an order, one should provide his PAN number. Otherwise, the certificate may not work properly. The government of India made it compulsory to provide PAN for all DSC if they want to use it in the Indian Income Tax portal. Therefore, you should give it without fail although it is not compulsory to make DSC.

We have made the DSC application process very smooth and easy. Just follow the 4-step method as given below to get one for your IT filing job.

Digital Signature Application Process.

Application process of DSC

  1. Select the right DSC, Choose validity, USB token option etc.
  2. Fill in the form with applicant details and PAN no.
  3. Click on ‘Add to cart’ button and then complete the order on the checkout page by making a fee payment.
  4. A verification link will be sent to complete the email, mobile & video verification of the applicant.
  5. Alternatively, share some basic documents so we can process it on your behalf. It will reduce your stress and headache of minor errors in DSC making.
  6. Finally, record your video for DSC. Wait some time till approval.
  7. Boom!! now your DSC is ready for download and further use.
Posted on Leave a comment

Digital signature for DGFT portal. DSC application and registration process.

Digital signature for DGFT portal

Digital signature for DGFT portal

A digital signature for the DGFT portal is mandatory for businesses dealing with export imports. DGFT (Directorate General of Foreign Trade) made it compulsory for all organisations to upload documents with valid digital signatures. It will ensure proper authenticity verification of the user and their records. Organisations can buy DGFT Digital Signature from DSC providers like Apicountry.

DGFT DSC is very crucial to making any change in the IEC or to extending the validity of the IEC. Sometimes the IEC becomes inactive due to non-updation on time. Using this DSC, organisations can re-active their IEC.

Apply DGFT Digital Signature

To apply for a DGFT Digital Signature, the organisation should have an Import Export Code (IEC) Certificate. IEC is a unique number assigned to all registered organisations in the DGFT portal. If an organisation want to register on the DGFT portal for the first time, they must buy a Class 3 Digital Signature. Refer to our article on how to purchase Class 3 digital signature for more details.

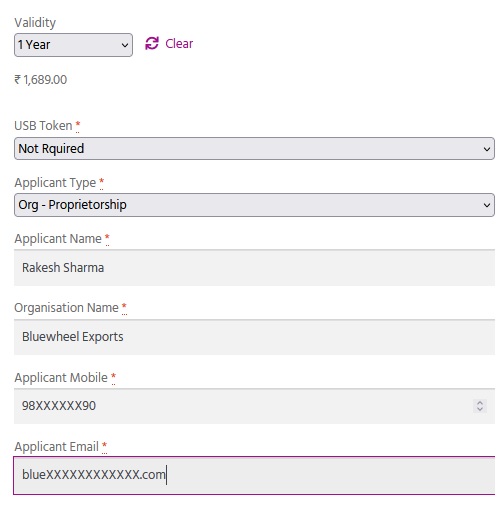
Step 1: To purchase DGFT DSC, submit a simple form as shown below.

Apply dgft digital signature

Step 2: After placing an order, you will receive a mobile and email verification request. It is a very simple OTP verification and can be completed without any issues.

Step 3: Then complete the video verification of the applicant. During video verification, the applicant needs to show available original documents on camera.

Step 4: Once the video gets approval, the applicant needs to complete the final step, downloading digital signature in a DSC token. You can now use the DSC after downloading.

Our executive will assist you in all the steps given above. So that you will experience a smooth application process.

DSC Registration Process

DSC registration process is straightforward in the DGFT portal.

  • Visit DGFT’s official site.
  • Login to the DGFT portal using your user ID and password.
  • After successful login, the user dashboard will appear.
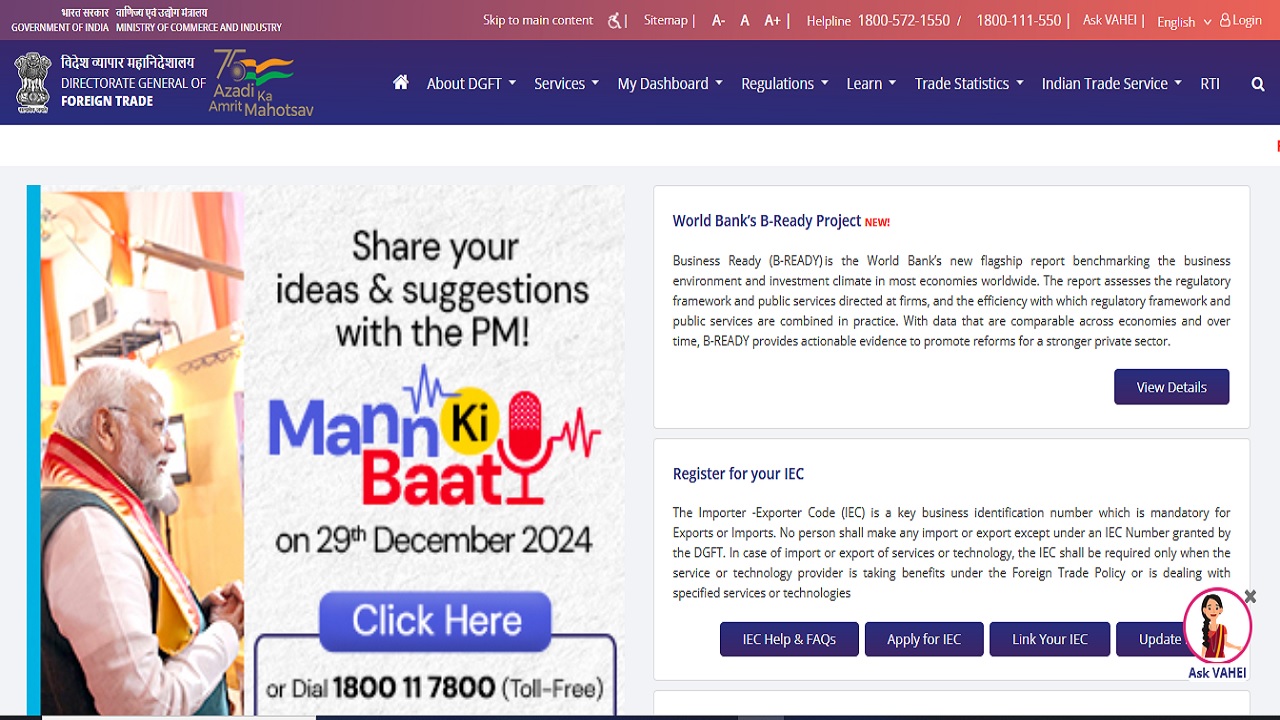
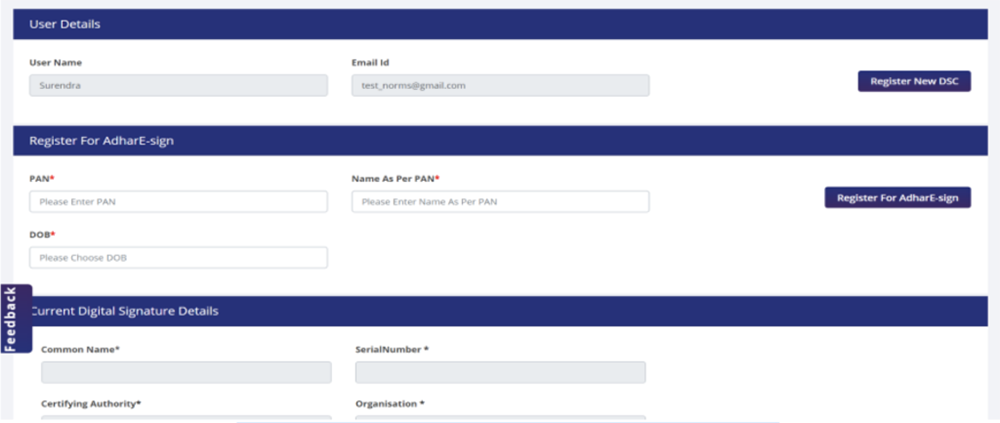
  • Click on the ‘My Dashboard’ drop-down menu and select ‘View and Register DSC’.
  • Scroll down till you see the ‘Register New DSC’ button.
  • Click on the ‘Register New DSC’ button to upload your DSC.
Upload digital signature to DGFT portal.
Posted on Leave a comment

Digital Signature for NSWS Portal. Check Price and Registration Process.

Digital Signature for NSWS Portal

Digital Signature for NSWS Portal. NSWS refers to the National Single Window System of the Government of India. It facilitates the application and registration of various licenses for investment in India. Anyone can avail of the following services from the NSWS portal.

  • Identification of requisite pre-establishment and pre-operation approval for setting up a business unit in India
  • Application of suggested approvals
  • Digital repository for storing documents related to approvals
  • Payment of processing fees to issue any approvals
  • Post application, tracking and status updates on applications submitted
  • Easy Renewal
  • Information about approvals such as timelines, fees, documents required etc.

Digital Signature for NSWS Portal

To take benefit of NSWS, a valid Digital Signature is required. A DSC ensures confirmation of the applicant’s authorization in the application process. Follow the steps below to DSC into the NSWS portal.

  • Buy a Digital Signature for NSWS uses. Apicountry is an authorised RA to issue a valid DSC.
  • Install DSC Token/Driver provided by Apicountry.
  • Run the necessary connecting application from the NSWS portal.
  • Open the Common Registration Form in the NSWS portal.
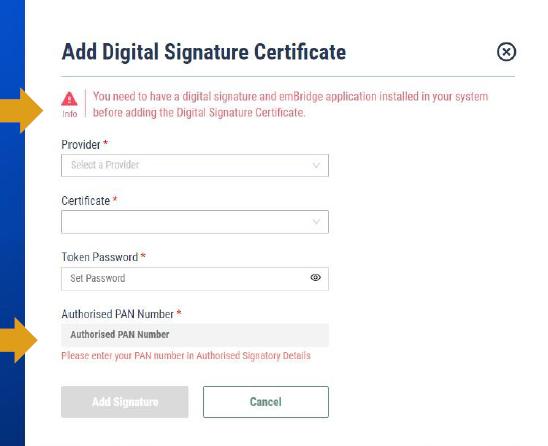
  • Proceed to add Authorised Signatory Details with the correct PAN as in DSC.
  • Click on the ‘Add’ button to register the DSC.
  • On the next screen select Apicountry Token from the dropdown list ‘Provider’.
  • Once the token is selected, DSC will be displayed in the ‘Certificate’ Field.
  • Then enter the token password and click the ‘Add Signature’ button.
Posted on 2 Comments

Old Token Exchange Offer. Replace Old Tokens For New One.

Old Token Exchange Offer

Old Token Exchange Offer

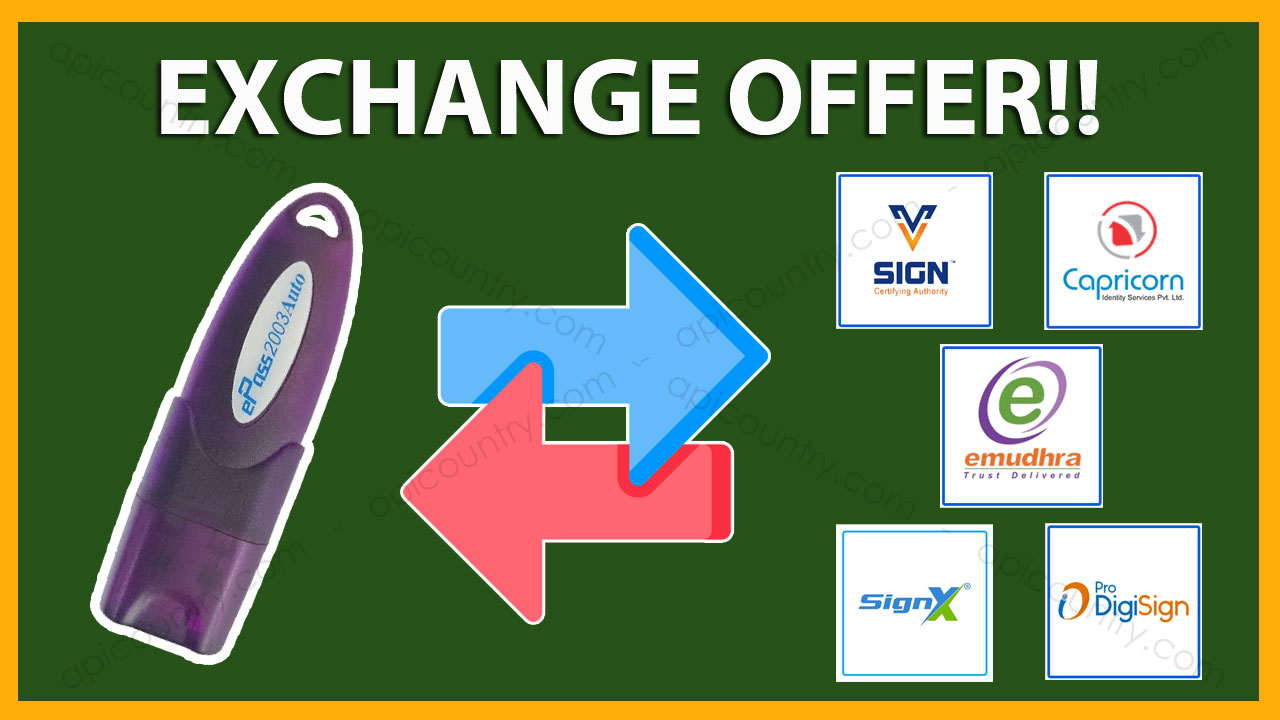
Old Token Exchange Offer means replacing old tokens with new tokens. Now you can get a new CSP 3.0 token against your old CSP1.0 and CSP2.0 Token. This offer is brought to you by Apicountry in collaboration with the Token manufacturer & certifying authorities.

In this offer, we collect unused tokens from you. In return, we give a new CSP 3.0 token. Only ePass2003Auto, HYP2003 and Watchdata Proxkey Tokens are eligible under this offer. The tokens should be taken from us only. The buyer should bear the applicable courier charges in this process

Can we exchange used tokens?

Currently, there is no offer available. We will soon launch its offer once we get confirmation from the respective companies. Don’t give used tokens along with new tokens. We have the full right to dispose of old tokens without paying any money and can not send them back to you.

How can we give tokens and buy counters?

You need to send Tokens to our office address by courier or by hand. Please fill out this Token Exchange Form and send it along with the tokens for a smooth exchange process.

What tokens are eligible for this return/exchange process?

Tokens of the below make/brands are eligible under this offer. The token name should be neat and clean. Don’t paste any gum or sticker over the token. Don’t send tokens that are not eligible.

Which address shall we send tokens to?

Tokens should be sent to the following address. Send an email with details of the tokens sent and the courier tracking number.

GATEGOLF TECHNOLOGIES LTD
460, 1ST FLOOR, TALASAHI, BARAMUNDA, BHUBANESWAR, ODISHA – 751003
MOB: 8658511010

What should we do after sending tokens?

Yes, you need to email us the following details.
1 – Courier tracking number.
2 – Token Exchange Form (soft copy) with exact count of tokens.

We have mixed tokens old and new both. What should we do?

In case you have mixed tokens, try to segregate them if possible. All tokens will go through a software check before accepting an exchange offer. The company will accept or count the clean tokens only. If they find any used tokens or tokens with gum or any mark on it, they will be rejected. No compensation or return will be provided for them. Therefore we request you do not send them.

When should we receive new tokens in return?

Generally, you will receive new tokens within 15 days from the date we receive the old tokens. However, the maximum time given is 30 days.

Posted on Leave a comment

ePass2003Auto is now HYP2003. ePass2003 Token Name Changed

HYP2003 Token

ePass2003Auto is now HYP2003.

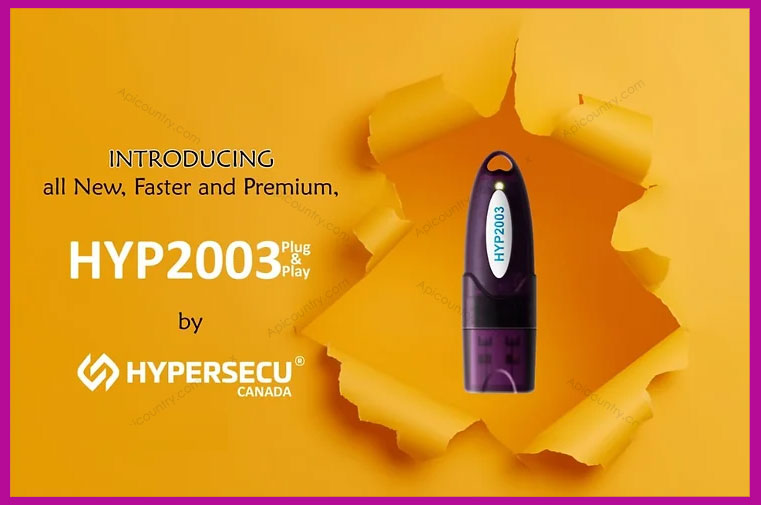
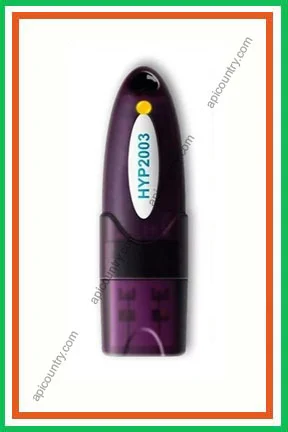
ePass2003Auto is now HYP2003. ePass name change into HYP by the token manufacturer. The new HYP2003 token is available in the CSP 3.0 version. Visit the product page for full token specification and price.

ePass2003 is a popular PKI token used to store Digital Signature certificates. It’s manufactured by Hypersecu. Now it is known as HYP2003. Token manufacturer rename it represents the latest modification in internal structure. Rest everything is same, like price feature & technical specification. No modification is done to the token hardware part.

The new HYP2003 by Hypersecu Canda is fully compatible with the new CCA guideline for USB Token. Buy the HYP2003 USB token from the following link.

Buy HYP2003 USB Token

Bulk USB Token in Bulk Quantity

HYP2003 (ePass) Token

The HyperPKI HYP2003 token requires no third-party drivers. All popular OS platforms such as Windows, MacOS, and Linux are fully compatible with the new HYP2003. These operating systems natively recognize the token in hardware make and version code.

Therefore this DSC dongle is very easy to use. There are no outside plugins necessary. High-level applications can communicate with the token through the PKCS library. It can handle standard operations, such as key pair generation, encryption, decryption, digital signing, and more using PKCS#11 library.

Now you can claim GST invoices for all token bulk orders. Buy more and save more.

Certifications

API/Protocols

  • Microsoft CAPI, CNG
  • PKCS#11 V2.20
  • Microsoft Smart Card Minidriver
  • PC/SC, CCID
  • SSL v3
  • IPSec/IKE

Supported Algorithms

  • RSA
  • ECDSA
  • AES
  • SHA-1/256/384/512
  • T-DES
Posted on Leave a comment

New USB Token Guidelines By CCA. Old Tokens are now not usable.

New USB Token Guidelines by CCA are now live. The latest November 2022 circular is in force. Old Tokens are now not usable. It will be going to add more burden to the common man as well as the DSC resellers.

As per the new guideline issued by CCA on 14th November 2022, there is going to be a major change in the USB Token software part. Please go through the following points to know all points in detail. With effect from 1-Apr-2023 following changes must be implemented.

USB Token Guidelines

  • No new USB Token shall be issued with the PIN Reset Option. It means all token manufacturers must disable the option to reset the token pin at the user level.
  • Users need to change the default token pin/password before downloading the certificate into it.
  • USB tokens should come with a unique serial numbering system with the first two digits containing the OEM’s (Original Equipment Manufacturer) name code. For example, WATCHDATA PROXKEY will have serial numbers like WD12345678. Similarly, HYP2003 will have serial numbers like HS12345678901 and so on. Refer to the following image for more clarification.

WHAT HAPPENS TO THE OLD SERIES OF TOKENS?

  • You can use the old series tokens till 31st March 2023 to download DSC.
  • Existing old tokens in which DSC is present will work till they are valid.
  • After expiry, the old tokens are not usable to re-issue new DSC.
  • The old Series tokens will not work to download the new certificate from April 1, 2023
  • To avoid a loss to the partner on account of unused stocks, the existing unused Tokens (Brand New) are eligible for an update to comply with New Guidelines 2.0 on a chargeable basis.
  • Old HYP2003 tokens are eligible for an update while ePass2003auto Tokens are not eligible for the update. Similarly, Emudhra, Vsign, Capricorn & Pantasign branded tokens are not eligible for the update.
  • Proxkey Watchdata tokens are eligible for an update if the serial number is greater than 3900000 only. It means any Watchdata Proxkey token having serial numbers below 3900000 can not be updated.
  • Please note that only brand-new tokens are eligible for the update. If the tokens are used in any way, they are not eligible for an update.
  • The unused token update facility is open from 20-Mar-2023 to 20-Apr-2023 only. It is only there to prevent our business partners from any financial loss.
Posted on Leave a comment

Proxkey Watchdata Token CSP Upgrade

Proxkey Watchdata Token CSP Upgrade

Proxkey Watchdata Token CSP Upgrade is very easy. You need to follow the following 8 points to upgrade your token to CSP 2.0, the latest one.

Proxkey Watchdata is one of the popular PKI tokens to store digital certificates. Without the latest CSP version, new certificates can not be downloaded. So the following points should be taken care of to get it done.

1 – Download Proxkey Watchdata Token CSP Upgrade Utility from this link. You need to run it after it is downloaded. The token should be connected to your computer during the process. You should uninstall the token driver before performing the upgrade process.

2 – Once you open the software, it will look like the image shown below.

proxkey update
Proxkey Watchdata Token CSP Upgrade Utility

3 – Click on the ‘Get Update Key’ button for the update code. Remember your token remains connected to the PC/laptop during the entire process. Also, close or uninstall the token driver.

4 – Now a browser will open and ask to enter the coupon code as shown below. Visit Update Token CSP Key to order your coupon code for this purpose.

watchdata token upgrade procedure
CSP Upgrade Procedure

5 – It takes 10 to 15 minutes to get the coupon code. It will be sent to the email ID that you set during the checkout. Collect it and enter it in the coupon code field.

watchdata csp upgrade - coupon applied successfully
Watchdata CSP upgrade – coupon applied successfully

6 – After the successful submission of the coupon code, a confirmation screen will be shown. You need to click on the ‘Generate Upgrade Key’ button to generate one.

Proxkey Token Upgrade Key

7 – Now a new screen will open containing the upgrade key. Just copy the code and paste it into the upgrade utility software. Now click on the ‘Update Token’ button as displayed below.

Proxkey CSP upgrade key submission

8 – If everything works normally, you will get a successful message. Click OK and your Proxkey token is now upgraded to CSP 2.0 successfully.

proxkey upgraded successfully
Proxkey upgraded successfully

You may like the following products

Posted on Leave a comment

How to Unlock Proxkey Watchdata Token

UNLOCK PROXKEY WATCHDATA USB TOKEN

Unlock Proxkey Watchdata Token in 5 simple steps. The unlock or unblock process is very easy and straightforward. Follow the instructions given below to unblock your Proxkey Watchdata USB Token.

Step 1: Connect your Proxkey Token to your computer. Login to the token manager and check the validity of the certificate.

Step 2: If there is no certificate inside the token or if the certificate is expired, place a request here for the token unblock.

Step 3: Now send an OTP to your registered email ID from your computer and enter it in your Proxkey token manager

Step 4: After successful authentication, your token will be unlocked. The system will ask to enter a new pin.

Step 5: Enter a new pin for your token & start using it.

If any support is required to unlock the Proxkey Watchdata token, place an order here for professional help.

Posted on Leave a comment

How to Download Aadhaar Offline XML File or Zip File.

Download Aadhaar Offline for Paperless eKYC

Aadhaar Offline XML File is a secure and shareable document that can be used by any Aadhaar holder for offline verification of identification. This is also called Aadhaar Paperless Offline e-KYC. Any Aadhaar holder can securely download his/her Aadhaar Offline XML/Zip file for paperless e-KYC.

Use the below link to download it. Use any one of the two links given below.
Download Aadhaar Offline XML File
Download Aadhaar Paperless Offline e-KYC

After downloading the Zip file you can extract it using the share code. The extract file should be an XML file containing vital information about your Aadhaar. You can use any one file format or both while applying DSC.

Some verification processes ask for zip format attachments while others ask to upload XML format only. These are the only two methods of using the offline Aadhar verification process.